Lift & Clean: Ultimate Gas Stove Burner Guide
Cart
Your cart is empty
A clean gas stove is the heart of every healthy kitchen. Yet many home cooks struggle with the best way to lift burners for cleaning without damaging delicate components. Proper burner maintenance goes beyond surface wiping—it requires understanding how to safely remove, clean, and reassemble each part. This comprehensive guide walks you through professional cleaning techniques that protect your investment while ensuring optimal cooking performance. Whether you're dealing with everyday spills or tackling months of buildup, mastering these methods will transform your cleaning routine and extend your stove's lifespan.
Safety should always be your top priority when cleaning gas stove burners. Improper handling can damage gas connections, misalign burner ports, or create dangerous gas leaks. Understanding your stove's specific design prevents costly repairs and ensures safe operation. Common mistakes include forcing stuck components, using excessive water near gas connections, and reassembling parts incorrectly. These errors can result in uneven flames, gas odors, or complete burner failure. Professional repair costs often range from INR 2,000 to INR 8,000, making proper technique a valuable skill. Regular deep clean gas burners maintenance offers multiple benefits. Clean burners distribute heat evenly, reducing cooking times and energy consumption. They also prevent food contamination from built-up grease and debris, supporting healthy kitchen cleaning practices.
Proper preparation sets the foundation for successful burner cleaning. Always ensure your stove has been off for at least 30 minutes before beginning any maintenance work.
Turn off the main gas supply if accessible, or ensure all burner controls are in the "off" position. Remove any cookware, trivets, or accessories from the stove surface. Gather your cleaning supplies: mild dish soap, baking soda, white vinegar, soft-bristled brushes, and lint-free cloths. Protect surrounding countertops with towels or plastic sheeting. Ensure adequate ventilation by opening windows or running exhaust fans during the cleaning process.
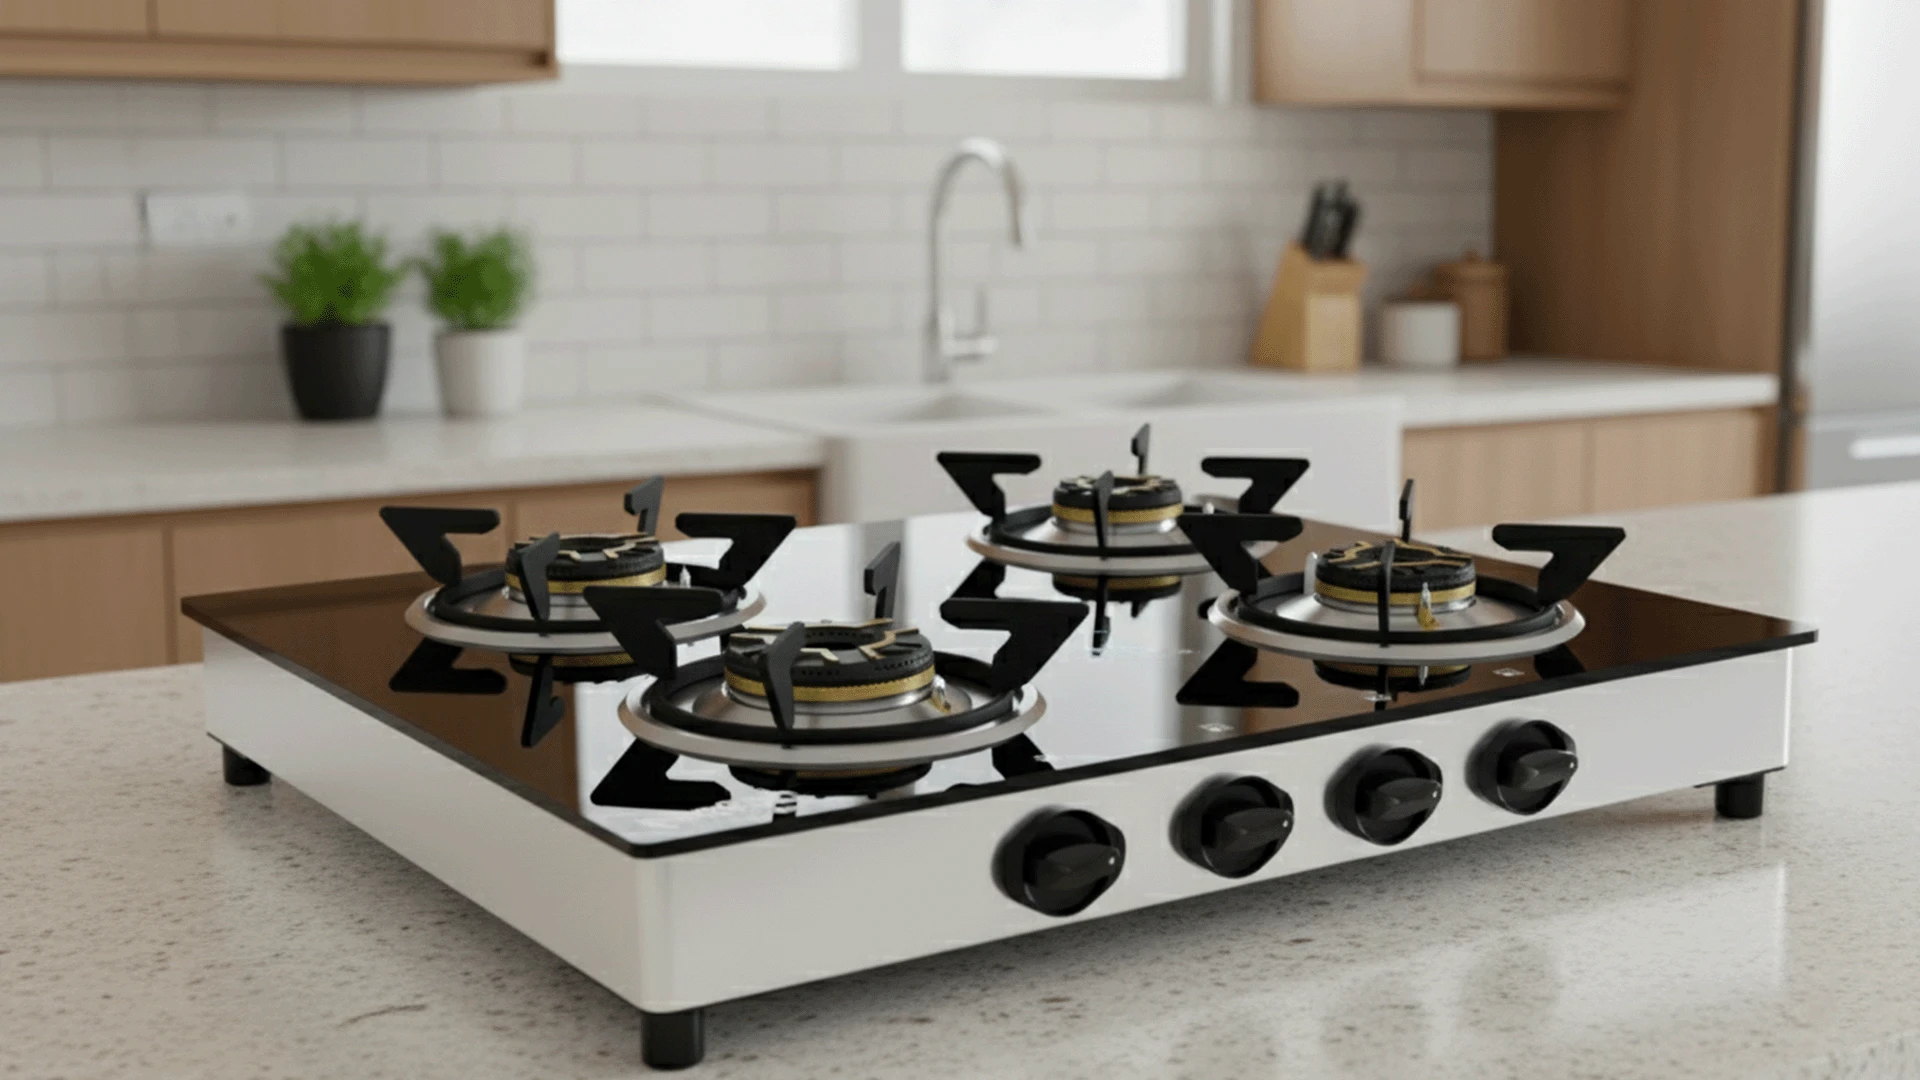
Sealed burner systems feature caps that lift straight up after cooling completely. Gently grasp the burner cap edges and lift vertically—never twist or force the movement. The burner head typically remains attached to the stove body. Open burner assemblies may have removable grates and drip pans. Lift grates first, then carefully remove burner assemblies by lifting straight up. Some models have clips or springs that require gentle pressure release.
Burner caps respond well to warm, soapy water soaking. For stubborn stains, create a paste using baking soda and water. Apply the paste, let it sit for 15 minutes, then scrub gently with a soft brush. Burner heads require careful attention to gas ports. Use a straightened paperclip or thin wire to clear clogged openings. Never use toothpicks, as wood fragments can block ports permanently. Cleaning stove grates depends on their material. Cast iron grates need immediate drying to prevent rust, while porcelain-coated grates can air dry safely.
Natural cleaning solutions offer effective results without harsh chemicals. These methods support healthy kitchen cleaning while protecting your family from toxic residues.
Baking soda paste works excellently for remove burner stains. Mix three parts baking soda with one part water to create a thick paste. Apply to stained areas and let sit for 20 minutes before scrubbing. White vinegar cuts through grease effectively. Mix equal parts vinegar and warm water in a spray bottle. This solution works particularly well on stainless steel surfaces and burner caps.
Food residue responds to gentle scraping with plastic tools, followed by soap and water cleaning. Avoid metal scrapers that can scratch delicate surfaces. Grease buildup requires degreasing action. Dawn dish soap mixed with warm water creates an effective burner cleaning solution. Let components soak for 30 minutes before scrubbing. Burn marks and discoloration often need multiple cleaning cycles. Apply baking soda paste, scrub gently, rinse, and repeat as necessary.
Soaking heavily soiled parts overnight saves scrubbing time. Fill a large basin with warm, soapy water and submerge removable components. Old toothbrushes excel at detail cleaning around burner ports and tight spaces. Keep dedicated cleaning toothbrushes separate from personal hygiene items. Establish weekly maintenance routines to prevent heavy buildup. Quick daily wipe-downs after cooking prevent stains from setting permanently.
Drip pans collect spills and protect your stove's internal components. Regular cleaning prevents permanent staining and maintains proper drainage. Removable drip pan systems vary by manufacturer. Some lift out easily, while others require burner removal first. Check your owner's manual for specific instructions. Stainless steel drip pans can withstand stronger cleaning solutions, while aluminum pans need gentler treatment. Chrome-plated pans should never be scrubbed with abrasive materials. Replace drip pans when cleaning no longer restores their appearance. Warped, cracked, or heavily stained pans compromise both function and aesthetics. Replacement pans typically cost INR 500 to INR 1,500 per piece.
Stuck burner components require patience and proper technique. Never force removal, as this can damage gas connections or break mounting clips.
Cooling time is crucial—hot metal expands and can bind components together. Wait at least one hour after cooking before attempting removal. Gentle rocking motions often free stuck caps. Rock slightly side to side while lifting upward. If resistance continues, check for hidden clips or locking mechanisms.
Warped burner caps create uneven flames and should be replaced immediately. Continued use can damage the burner head and create safety hazards. Cracked components allow gas leaks and require professional attention. Never attempt to repair damaged gas-carrying parts yourself.
Clean burner caps weekly and perform deep cleaning monthly. Heavy cooking may require more frequent attention.
Most burner caps and grates are dishwasher-safe, but check your manual first. Use gentle cycles and avoid heated drying for best results.
Use thin wire or straightened paperclips to clear ports gently. Never use wooden toothpicks or force debris deeper into openings.
Call professionals for gas odors, uneven flames, or components that won't stay in place. These issues indicate potential safety hazards.
Avoid bleach, ammonia, and abrasive cleaners. These can damage finishes and create dangerous chemical reactions.
Mastering the best way to lift burners for cleaning transforms routine maintenance into a simple, safe process. Regular cleaning prevents costly repairs while ensuring optimal cooking performance. Remember that patience and proper technique always outweigh speed when working with gas appliances. With these methods, you'll maintain a healthy kitchen environment while protecting your investment for years to come.
