How to Install a Chimney: DIY Guide for Beginners
Cart
Your cart is empty
Installing a chimney might seem like a complex task, but with the right guidance and tools, many homeowners can successfully complete this project themselves. Whether you're looking to install a kitchen chimney for better ventilation or setting up a wood stove chimney for heating, understanding the basics of DIY chimney installation can save you money and give you valuable home improvement skills. This comprehensive guide will walk you through everything you need to know about chimney installation, from planning and preparation to final testing and maintenance. We'll cover different types of chimneys, essential tools, step-by-step installation processes, and important safety considerations to ensure your project is both successful and safe.
Before diving into any chimney installation project, it's crucial to understand the different types of chimneys and their specific requirements. Each type serves different purposes and requires unique installation approaches, tools, and considerations.
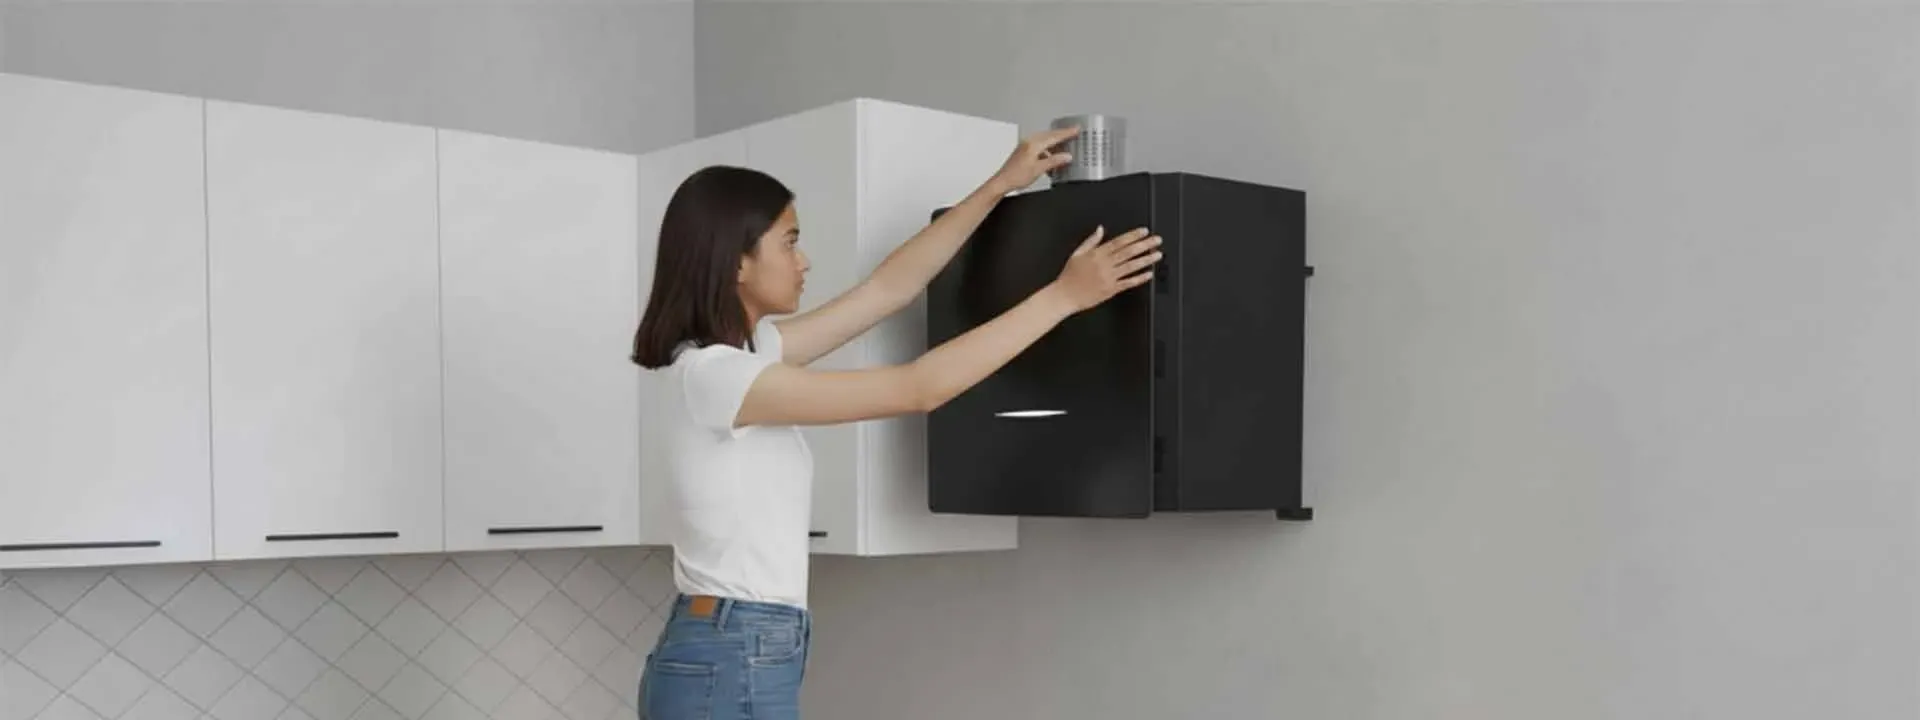
Kitchen chimneys and fireplace chimneys serve completely different functions and require distinct installation methods. Kitchen chimneys focus on removing cooking smoke, grease, and odors from your cooking area. They typically mount above your cooktop and connect to ductwork that vents outside your home. These systems often include electrical components for fans and lighting, making electrical connections a key part of the installation process. Fireplace chimneys, on the other hand, handle much higher temperatures and require more robust construction. They must safely channel hot gases and smoke from wood-burning fires up and out of your home. The installation involves creating a proper flue system that can withstand extreme heat while maintaining structural integrity.
The 3-2-10 rule is fundamental to proper chimney installation. This rule states that your chimney must extend at least 3 feet above the roof where it penetrates, and at least 2 feet higher than any part of the building within 10 feet horizontally. This ensures proper draft and prevents downdrafts that could push smoke back into your home. Local building codes vary significantly across different regions, so checking with your local building department is essential before starting any chimney installation project. Many areas require permits for chimney work, especially for new installations or major modifications. Some jurisdictions mandate professional inspections at various stages of the installation process.
While many chimney installations can be DIY projects, certain situations require professional expertise. Complex installations involving structural modifications, gas line connections, or installations in multi-story buildings often need professional handling. Additionally, if your local codes require licensed contractor work, attempting DIY installation could create legal and insurance issues. Consider your skill level honestly when deciding between DIY and professional installation. If you're comfortable with basic construction tasks, have the necessary tools, and understand safety procedures, many chimney installations are within reach of determined DIYers.
Successful chimney installation starts with proper planning and having the right tools and materials ready. Taking time to plan thoroughly will save you time, money, and frustration during the actual installation process.
For kitchen chimney installation, you'll need a drill with various bits, level, measuring tape, screwdrivers, wire strippers, and safety equipment including safety glasses and gloves. Specific materials include mounting brackets, screws appropriate for your wall type, ductwork, electrical wire, and wire nuts for connections. Wood stove chimney installations require additional tools including a reciprocating saw for cutting openings, metal snips for ductwork modifications, and high-temperature sealant. Materials include chimney pipe sections, roof flashing, storm collar, and appropriate fasteners rated for outdoor use.
Accurate measurements are critical for successful chimney installation. For kitchen chimneys, measure the distance from your cooktop to the ceiling, accounting for the recommended clearance above your cooking surface. Most manufacturers specify minimum clearances, typically 24-30 inches above gas cooktops and 18-24 inches above electric cooktops. Create a simple installation drawing showing the chimney location, ductwork route, and electrical connections. This helps identify potential obstacles and ensures you have all necessary materials before starting. Consider the shortest, most direct route for ductwork to maximize efficiency.
DIY chimney installation costs vary significantly based on chimney type and complexity. Kitchen chimney installations typically cost between INR 15,000 to INR 40,000 for materials, including the chimney unit, ductwork, and electrical supplies. Wood stove chimney installations can range from INR 25,000 to INR 75,000, depending on the height and complexity of the installation. Tool costs can add INR 5,000 to INR 15,000 if you don't already own the necessary equipment. However, these tools will serve you well for future home improvement projects, making them a worthwhile investment for active DIYers.
Kitchen chimney installation is often the most common DIY chimney project homeowners undertake. Following a systematic approach ensures proper installation and optimal performance.
Start by turning off electricity to the area where you'll be working. Mark the mounting locations using your chimney's template or measurements from the manufacturer's instructions. Use a stud finder to locate wall studs for secure mounting, especially important for heavier chimney units. If your installation requires ductwork through an exterior wall, carefully mark the opening location. Measure twice and cut once - exterior wall modifications are difficult to undo. Consider the location of electrical wiring, plumbing, and other utilities before cutting any openings.
Secure mounting brackets to wall studs whenever possible for maximum support. If studs aren't available in the ideal location, use appropriate wall anchors rated for your chimney's weight. Most kitchen chimneys weigh between 15-30 kg, so choose anchors accordingly. Use a level to ensure brackets are perfectly horizontal - an uneven installation affects both appearance and performance. Mark all screw locations before drilling to ensure accuracy. Pre-drill holes slightly smaller than your screws to prevent wall damage while ensuring secure attachment.
Connect ductwork starting from the chimney and working toward the exterior vent. Use metal ductwork rather than flexible ducting whenever possible for better airflow and durability. Seal all connections with appropriate duct sealant or metal tape to prevent air leaks. Route ductwork with minimal bends and turns to maximize efficiency. Each 90-degree turn reduces airflow by approximately 25%, so plan the most direct route possible. Support long ductwork runs with appropriate hangers to prevent sagging.
Wood stove and fireplace chimney installations involve higher temperatures and more complex safety considerations than kitchen chimneys. These installations require careful attention to clearances and fire safety.
Stove pipe installation requires maintaining proper clearances from combustible materials. Single-wall stove pipe typically requires 18 inches clearance from combustible surfaces, while double-wall pipe reduces this to 6-8 inches. Always follow manufacturer specifications for your specific pipe type. Connect stove pipe sections with the crimped end pointing down toward the stove. This prevents creosote from leaking at joints. Use three screws per joint for secure connections, and ensure all joints are tight to prevent dangerous gas leaks.
Fireplace chimney installation often involves working with existing masonry or installing prefabricated systems. Masonry chimneys require specialized skills and tools, making them better suited for professional installation. Prefabricated systems offer more DIY-friendly options while still providing excellent performance. Proper flue sizing is critical for fireplace performance. The flue area should be approximately 1/10th the fireplace opening area for optimal draft. Incorrect sizing leads to poor performance, smoke problems, and potential safety hazards.
Chimney liner installation and replacement are common DIY projects that can significantly improve chimney performance and safety. Understanding when and how to install liners helps maintain your chimney system properly.
Yes, you can install a chimney liner yourself in most cases, particularly for flexible stainless steel liners. These installations typically involve measuring the chimney, selecting appropriate liner size, and carefully installing the liner from the top of the chimney down to the appliance connection. Flexible liners work well for chimneys with bends or offsets, while rigid liners suit straight chimneys better. The installation process involves connecting the liner to the appliance, pulling it up through the chimney, and securing it at the top with appropriate hardware.
Determining whether to repair or replace a chimney depends on the extent of damage and the chimney's overall condition. Minor issues like loose flashing, small cracks, or damaged chimney caps often qualify for repair. However, significant structural damage, extensive deterioration, or safety code violations may require complete replacement. Inspect your chimney annually for signs of damage including white staining (efflorescence), rust on dampers or firebox, damaged mortar joints, or animals/birds in the chimney. Address problems promptly to prevent more extensive and expensive damage.
Proper testing and ongoing maintenance ensure your DIY chimney installation remains safe and effective for years to come. Never skip these critical final steps.
After completing your chimney installation, conduct thorough testing before regular use. For kitchen chimneys, test all fan speeds and lighting functions. Check that ductwork connections are secure and that airflow moves in the correct direction. For wood stove and fireplace chimneys, perform a smoke test using smoke pellets or newspaper to verify proper draft. Smoke should draw up the chimney without entering the room. Install smoke and carbon monoxide detectors near the installation area for ongoing safety monitoring.
Incorrect height calculations represent the most common DIY chimney installation mistake. Always follow the 3-2-10 rule and local code requirements for proper chimney height. Inadequate sealing around roof penetrations leads to water damage and should be addressed with proper flashing and sealants. Electrical errors in kitchen chimney installations can create fire hazards. Always follow electrical codes and consider hiring an electrician for complex electrical connections. Never exceed the electrical capacity of existing circuits when adding new appliances.
Regular maintenance keeps your chimney system operating safely and efficiently. Kitchen chimneys require monthly filter cleaning or replacement, depending on usage. Clean grease buildup from ductwork annually to prevent fire hazards and maintain optimal performance. Wood stove and fireplace chimneys need annual professional cleaning and inspection. However, you can perform basic maintenance including checking for animal intrusion, inspecting the chimney cap, and monitoring for exterior damage between professional services.
Chimney installation must follow the 3-2-10 rule: chimneys must extend at least 3 feet above the roof penetration point and 2 feet higher than any structure within 10 feet horizontally. Local building codes may have additional requirements including permits, inspections, and specific clearance requirements.
Yes, most homeowners can install flexible stainless steel chimney liners themselves. The process involves measuring the chimney, selecting the correct liner size, and carefully installing from top to bottom. However, complex installations or local code requirements may necessitate professional installation.
DIY kitchen chimney installation typically costs INR 15,000 to INR 40,000 for materials. Wood stove chimney installations range from INR 25,000 to INR 75,000. Professional installation costs 2-3 times more, making DIY installation an attractive option for capable homeowners.
Basic tools include a drill with various bits, level, measuring tape, screwdrivers, and safety equipment. Specific installations may require additional tools like reciprocating saws, metal snips, or specialized chimney tools. Most tools can be rented if you don't own them.
Permit requirements vary by location and installation type. Many jurisdictions require permits for new chimney installations or major modifications. Check with your local building department before starting any chimney work to ensure compliance with local codes.
Kitchen chimney installation typically takes 4-8 hours for experienced DIYers. Wood stove chimney installations can take 1-3 days depending on complexity. Allow extra time for planning, obtaining permits, and addressing unexpected challenges during installation.
DIY chimney installation can be a rewarding project that saves money while improving your home's functionality and safety. Success depends on careful planning, using proper tools and materials, and following safety guidelines throughout the process. Understanding the differences between kitchen chimneys and fireplace chimneys helps you choose the right approach for your specific project. Remember that while many chimney installations are suitable for DIY completion, complex projects or local code requirements may necessitate professional assistance. When in doubt, consult with professionals to ensure your installation meets all safety and legal requirements. Regular maintenance and inspection keep your DIY-installed chimney operating safely and efficiently for years to come.
