How to Align Kitchen Chimney and Hob Perfectly
Cart
Your cart is empty
Getting your kitchen chimney and hob alignment right makes all the difference in how well your kitchen works. Poor positioning leads to smoke escaping, grease buildup, and inefficient ventilation that defeats the purpose of having these appliances. When you understand the kitchen chimney and hob alignment basics, you create a cooking space that's both functional and beautiful. The right setup ensures optimal airflow, keeps your kitchen clean, and adds to your modern kitchen design. Whether you're working with a compact kitchen or a spacious cooking area, proper alignment is the foundation of effective kitchen ventilation.
Proper alignment between your kitchen chimney and kitchen hob creates the foundation for effective cooktop ventilation. This positioning directly impacts how well smoke, steam, and cooking odors get captured and removed from your cooking space. The alignment affects both the functional performance of your appliances and the overall aesthetic appeal of your modern kitchen design.
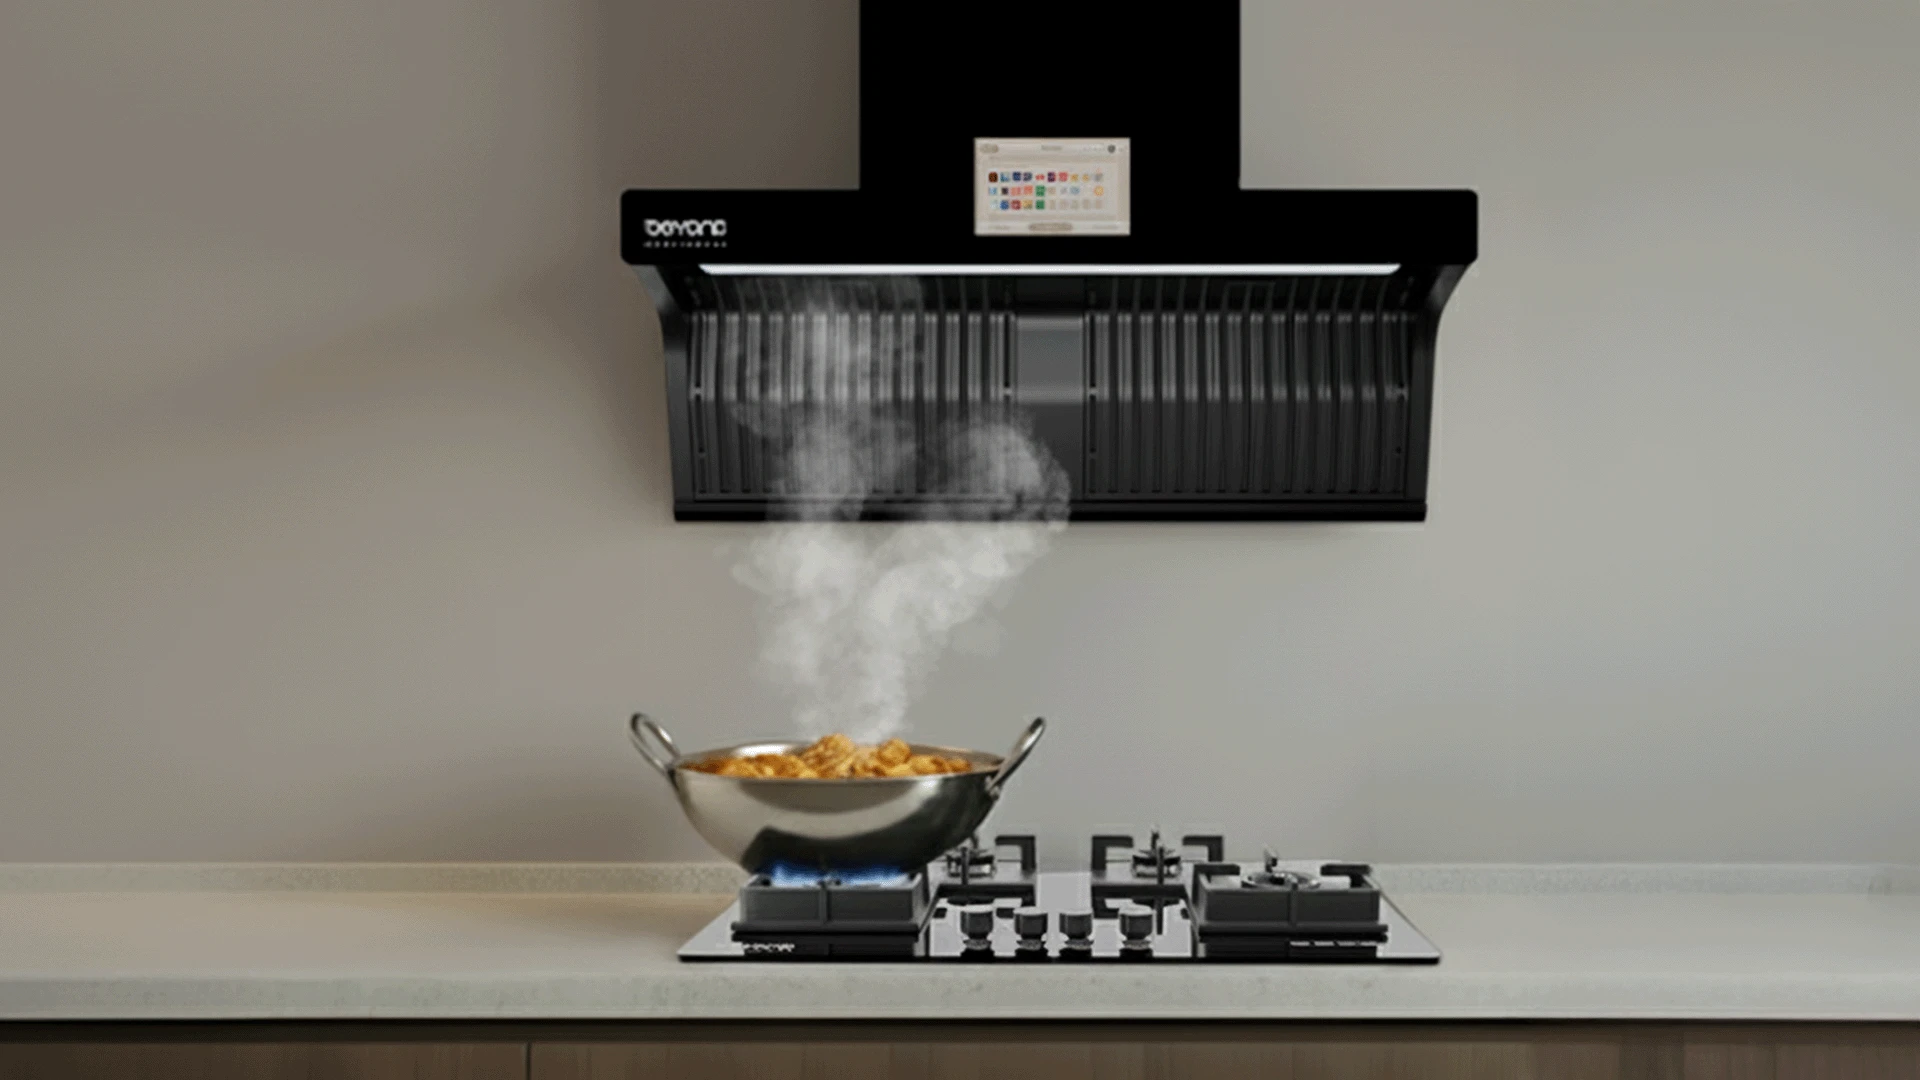
The relationship between your hob and chimney determines ventilation efficiency. When positioned correctly, the chimney captures cooking fumes at their source before they spread throughout your kitchen. This prevents grease from settling on surfaces and keeps cooking odors from lingering in your home.
Incorrect alignment creates safety risks that go beyond poor ventilation. Too close positioning can create fire hazards, while too distant placement reduces effectiveness. The right distance ensures safe operation while maintaining optimal suction power for your kitchen ventilation system.
Accurate measurements form the backbone of successful hob and chimney installation. Getting these numbers right the first time saves you from costly adjustments later. Standard measurements provide a starting point, but your specific kitchen layout may require modifications to achieve perfect alignment.
The optimal distance between your cooktop and chimney ranges from 24 to 30 inches. This measurement ensures effective smoke capture while maintaining safe clearance from heat sources. Gas cooktops typically require the full 30-inch clearance, while electric and induction hobs can work with slightly closer positioning.
Your kitchen chimney should extend at least 6 inches beyond each side of your hob for complete coverage. This overhang ensures that cooking fumes don't escape around the edges. For compact kitchen spaces, choose chimney models that maximize coverage without overwhelming the visual space.
Successful installation requires careful planning and precise execution. Taking time during the preparation phase prevents alignment issues that are difficult to correct later. Each step builds on the previous one to create perfect positioning for your kitchen appliances.
Start by evaluating your kitchen layout and identifying the optimal placement for both appliances. Check wall structure to ensure it can support the chimney weight. Verify electrical connections are available and plan ducting routes to minimize bends and maximize efficiency.
Find the center point of your planned hob location and mark it clearly on the wall. Use a level to ensure your markings are straight and accurate. Double-check all measurements before drilling any holes. Create a template from cardboard to visualize the final positioning.
Perfect alignment maximizes the efficiency of your kitchen ventilation system. When your chimney sits directly above your hob with proper clearance, it creates optimal airflow patterns that capture cooking fumes effectively. This positioning reduces the workload on your chimney motor and extends its lifespan.
Proper alignment creates a direct path for cooking fumes to travel from your cooktop to the chimney intake. This straight-line airflow requires less suction power to achieve the same results. Misaligned installations force the motor to work harder, increasing energy consumption and noise levels.
Straight ducting runs provide the best performance for your kitchen chimney. Each bend or turn in the ductwork reduces efficiency by approximately 10-15%. Plan your chimney installation to minimize ducting complexity while maintaining proper alignment with your hob.
Your hob and chimney alignment should enhance your kitchen's visual appeal while delivering functional benefits. Modern kitchen design emphasizes clean lines and balanced proportions. Proper alignment creates visual harmony that makes your cooking space feel more organized and professional.
Centered alignment creates visual symmetry that appeals to the eye. This positioning works especially well in compact kitchen designs where every element needs to contribute to the overall aesthetic. Consider how your appliance placement affects the visual weight distribution in your kitchen space.
Your chimney and hob positioning should complement your cabinet layout and counter design. Plan the alignment to work with your kitchen's architectural features rather than fighting against them. This creates a cohesive look that enhances your home's value.
Having the right tools makes installation smoother and ensures better results. Safety should always be your top priority during any kitchen chimney installation project. Professional installation may be worth considering for complex setups or when dealing with gas connections.
You'll need a drill with masonry bits, a level, measuring tape, and a stud finder for wall-mounted installations. A template helps ensure accurate positioning before you commit to drilling holes. Safety equipment includes eye protection and work gloves.
Complex electrical work, gas line modifications, or structural changes require professional expertise. If your installation involves ducting through exterior walls or roof penetrations, professional installation ensures proper sealing and code compliance.
Even with careful planning, alignment problems can occur during or after installation. Recognizing these issues early allows for easier correction. Most alignment problems have straightforward solutions that don't require complete reinstallation.
Inadequate smoke capture usually indicates alignment issues. If cooking fumes escape around the edges of your chimney, the coverage area may be insufficient. Excessive noise can result from the motor working harder to compensate for poor positioning.
Minor alignment issues can often be corrected by adjusting the chimney position within its mounting brackets. For more significant problems, you may need to relocate mounting points. Document any changes for future reference and maintenance needs.
The optimal distance ranges from 24 to 30 inches, with gas cooktops requiring the full 30-inch clearance for safety. This distance ensures effective smoke capture while maintaining safe operation.
Measure your hob's width and mark the center point on the wall above it. Use a level to ensure your chimney mounting points align with this center mark for perfect positioning.
Basic installations are suitable for DIY projects, but complex setups involving electrical work, gas connections, or structural modifications require professional installation for safety and code compliance.
Poor alignment reduces ventilation efficiency, allows cooking fumes to escape, creates potential safety hazards, and impacts your kitchen's aesthetic appeal.
Your chimney should be at least as wide as your hob, preferably extending 6 inches beyond each side for optimal coverage and effective fume capture.
Proper kitchen chimney and hob alignment creates the foundation for effective kitchen ventilation and enhances your cooking experience. Taking time to plan measurements, understand airflow dynamics, and follow safety guidelines ensures optimal performance from your appliances. Whether you're designing a compact kitchen or updating a larger space, these alignment principles help you create a functional and beautiful cooking environment that serves your needs for years to come.
